How to Run Deep Learning on a PC Running Windows, MacOS, or Linux with Devcontainers
I have been working to make Deep Learning Accessible on Windows Machines by providing a Linux Docker Image on top of WSL Linux and connecting to the GPU.
I am currently setting up a UQ Lab Machine with an RTX2080 which is a pretty good GPU although the memory is a bit small.
So here are the steps to getting this system up and running.
First we need to make some changes to our Windows host. There are only three software tools we need to install - WSL, Docker, and Visual Studio Code.
- Connect to a Machine in 78-336 with a GPU.
- Install Windows Subsystem for Linux with a Ubuntu image.
- Install Docker Desktop for Windows
- Update Nvidia Drivers (only required if you have a GPU)
- Install Visual Studio Code
Note that if you are running on Linux or a Mac, you should already have the Linux Kernel installed, so you may simply need to install Docker and Visual Studio Code.
1. First Connect to a PC with a GPU
Use remote desktop to connect to a machine in 78-336 by connecting to rdp.labs.eait.uq.edu.au.
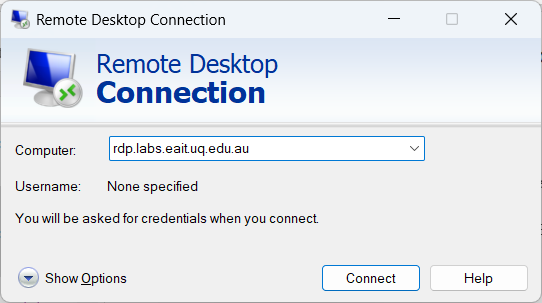
Go through the connection diaglog and type your UQ credentials.
Finally you will see connection options including DL_GPU_Lab (78-336). Select this and choose your machine from the list. It is best to keep the same machine all the time or you may have to reinstall this software.
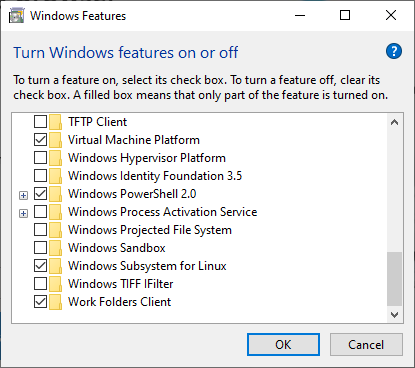
2. So Let’s Get Started on WSL
Follow these instructions based on Microsoft Instructions.
First check that Windows Subsystem for Linux is ticked in Windows Features as per below. Open this by searching for Turn Windows features on or off.
This may require a reboot before you go further. To ensure you get back to the same machine, please note the number of your machine in the pool which should be of the form gs336-XXXX.
Finding the Name of your Machine
You can find out the name of the machine by searching for System Information. Just write down the 4 digit number.
A shutdown can be initiated manually by the following command:
shutdown /r
After rebooting it is a bit tricky finding your machine in the list. Try typing your machine name XXXX to narrow down the list.
Click on your machine name and log in. Open a console window and type:
wsl --update

Installing Ubuntu-26.04 distribution
Now install the Ubuntu distribution.
wsl --install Ubuntu-26.04
It will ask you for a Linux username and password, I suggest you use your UQ credentials. Then the console will enter the Linux session with your username.
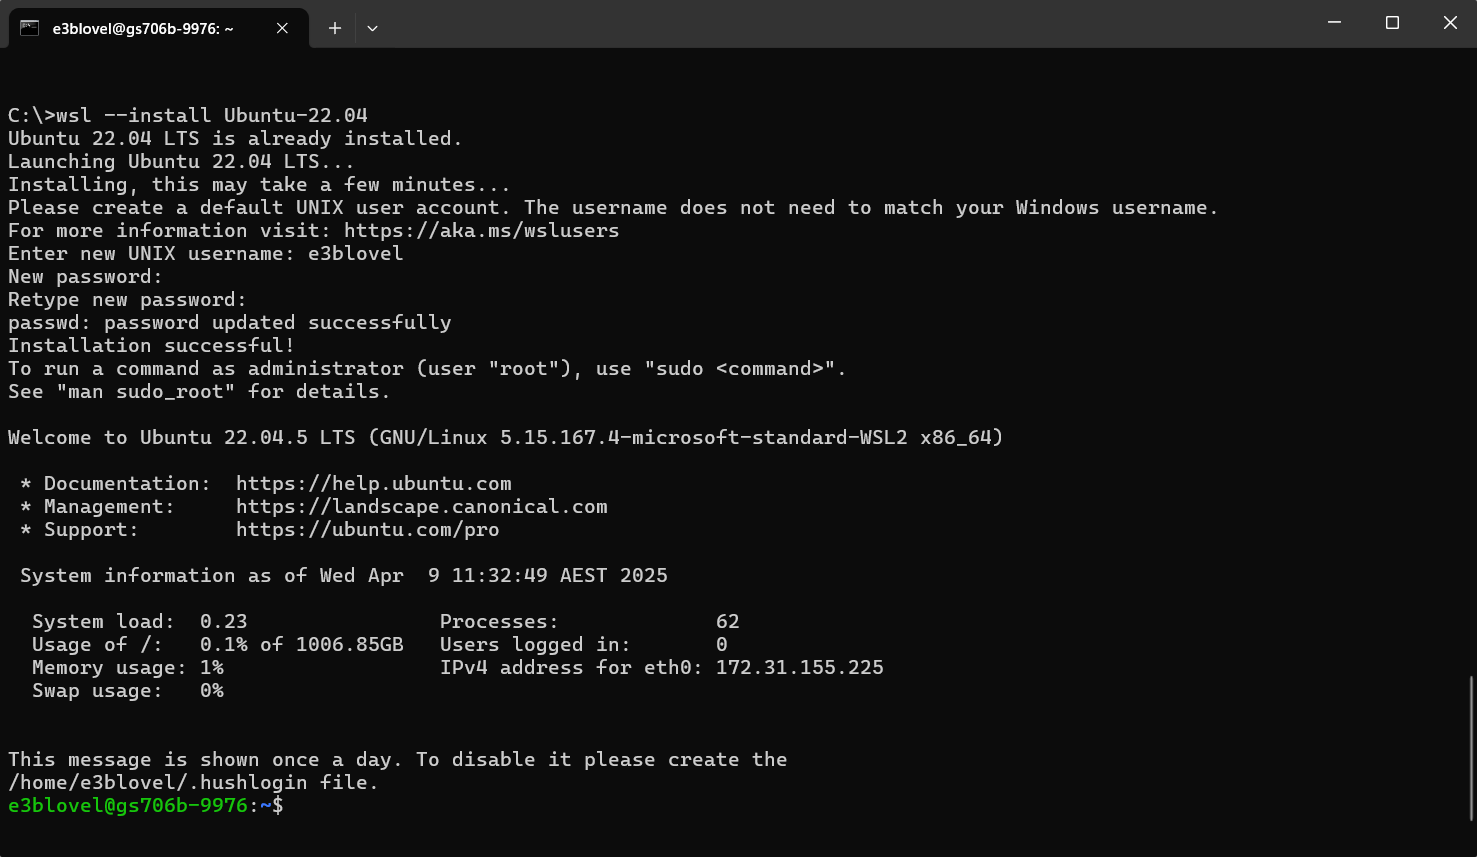
Type exit to go back to the console window. Type the following:
wsl -l -v
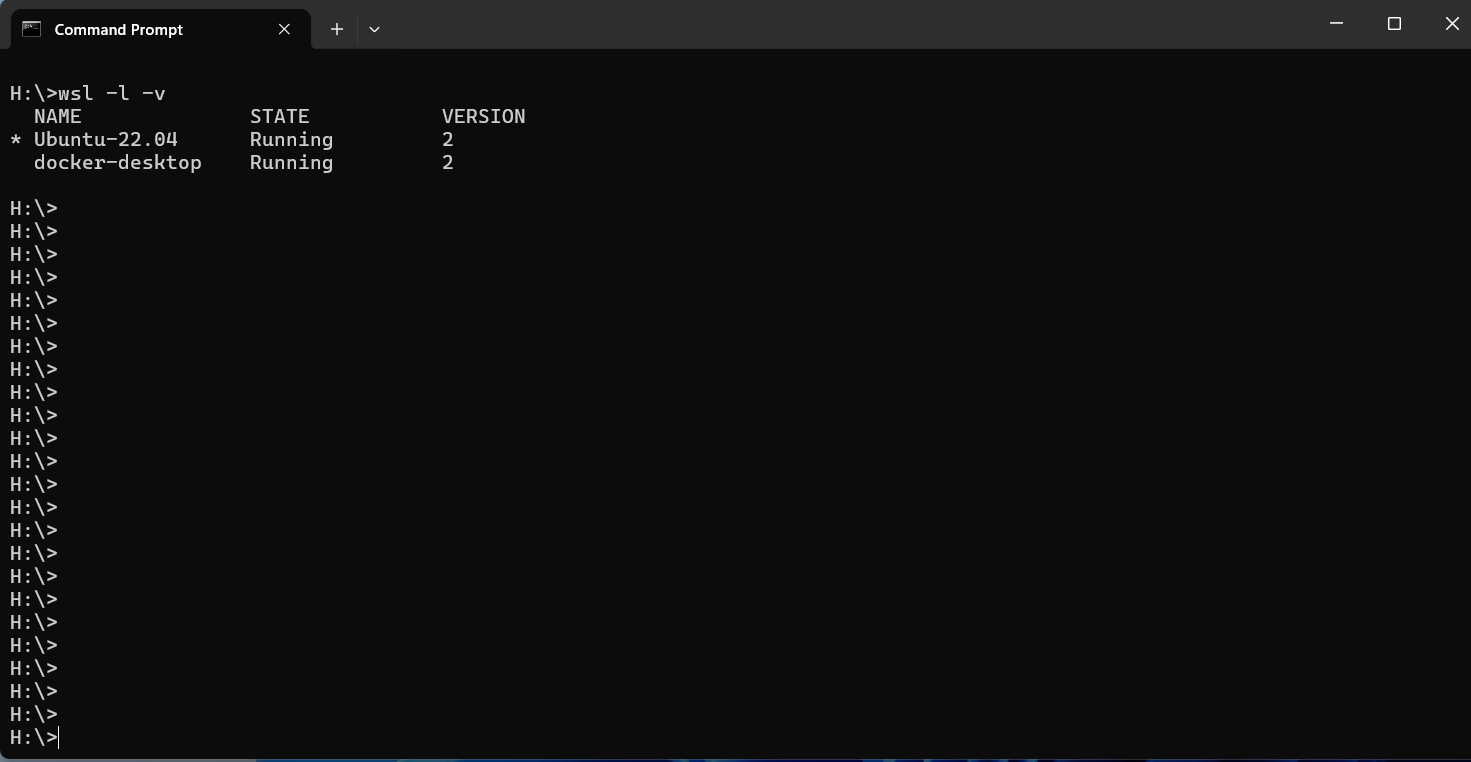
The * indicates the default distribution is Ubuntu-26.04 and it is running Ubuntu-26.04 and docker-desktop with version 2 of WSL. This is the correct configuration. Good job!
If the * is not on Ubuntu-26.04, change it with
wsl --set-default Ubuntu-26.04
If you want to remove an extra distribution that you have inadvertantly installed, type
wsl --unregister <Distribution name>
You should finally get the correct configuration.
You now have a Linux machine that you can access just like an app on your windows machine. Just type wsl to enter Linux and exit to go back to Windows. Alternatively, access Ubuntu directly from the recently added applications. It is best to pin Ubuntu-26.04 to the Taskbar for easy access.
Note: If you have forgotten your username password, you can reset it by opening a Windows console and typing the following commands. This will open wsl as root and allows you to easily reset the password of username.
wsl -u root
passwd <username>
Once your password is reset, reopen the WSL session and use your brand new password.
3. Now we Install Docker Desktop for Windows
Simply follow the
Docker Installation Instructions
and install the software. Do not try to fetch software from the Microsoft Store as possibly suggested by Windows. Also note that Docker desktop runs much better on Windows 11 compared to Windows 10.
Docker will ask you to restart your PC to complete installation. If you are installing remotely on the UQ Labs, please wait a few minutes for the machine to reboot. Once it appears, log in and eventually you will see the following window.

Next accept the Docker subscription agreement and Docker Desktop will open and ask you to setup or sign into your account.
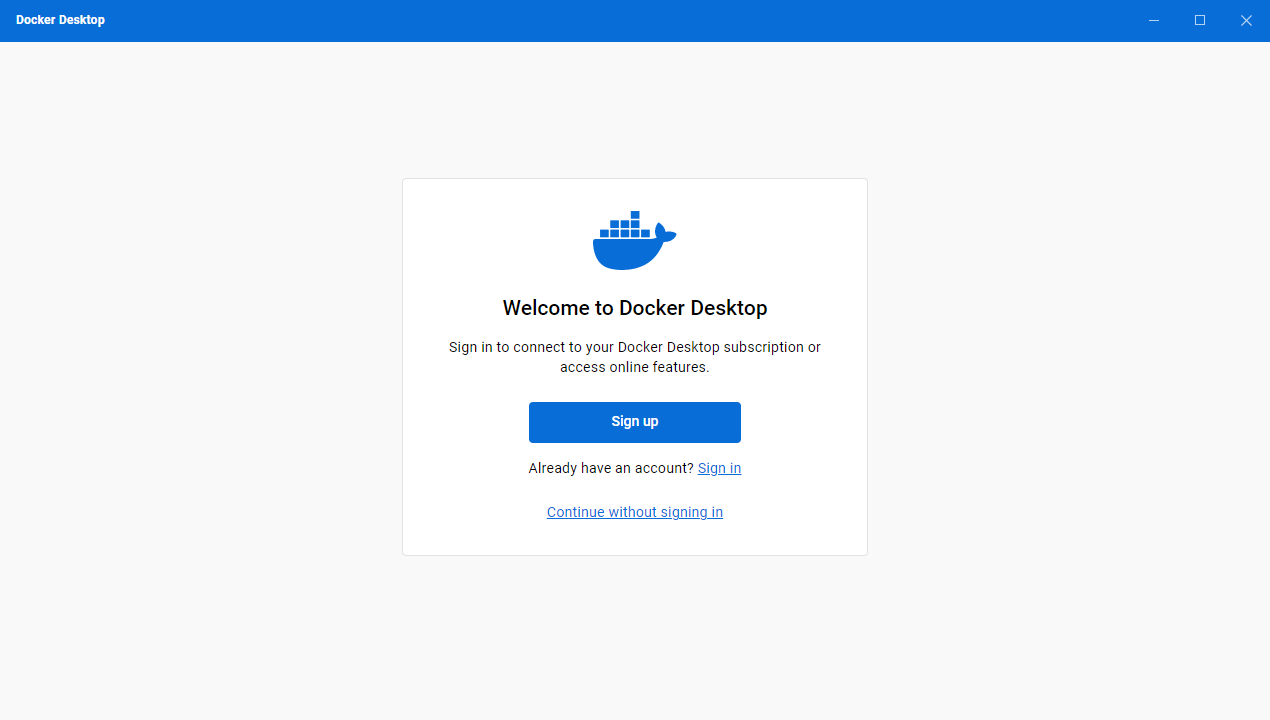
Once you have done that, you are in.
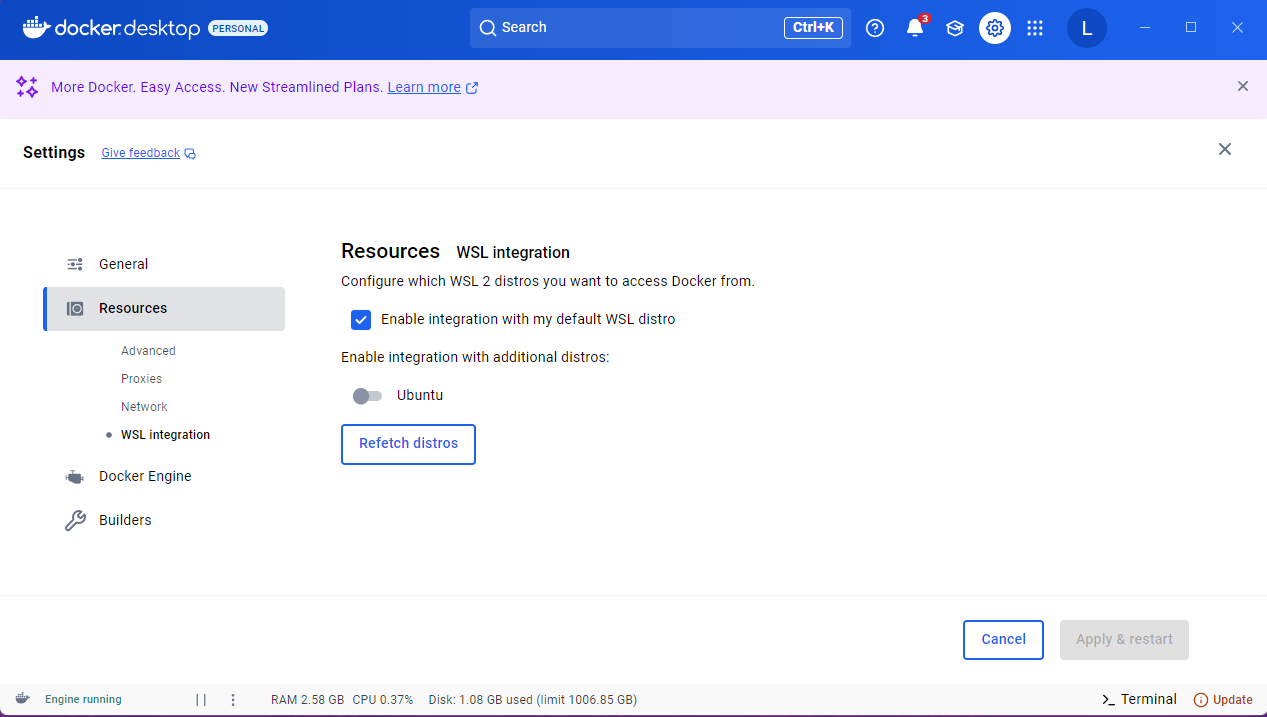
Now you will need to configure Docker desktop. Go to Settings and select Resources/WSL integration. Make sure the sliders are set as follows to allow Docker to integrate to your Ubuntu image. Check these sliders occasionally as they sometimes get reset.
Tip: If Docker Desktop complains about Group Permission Errors simply uninstall and download the latest version from the website. This will fix the problem.
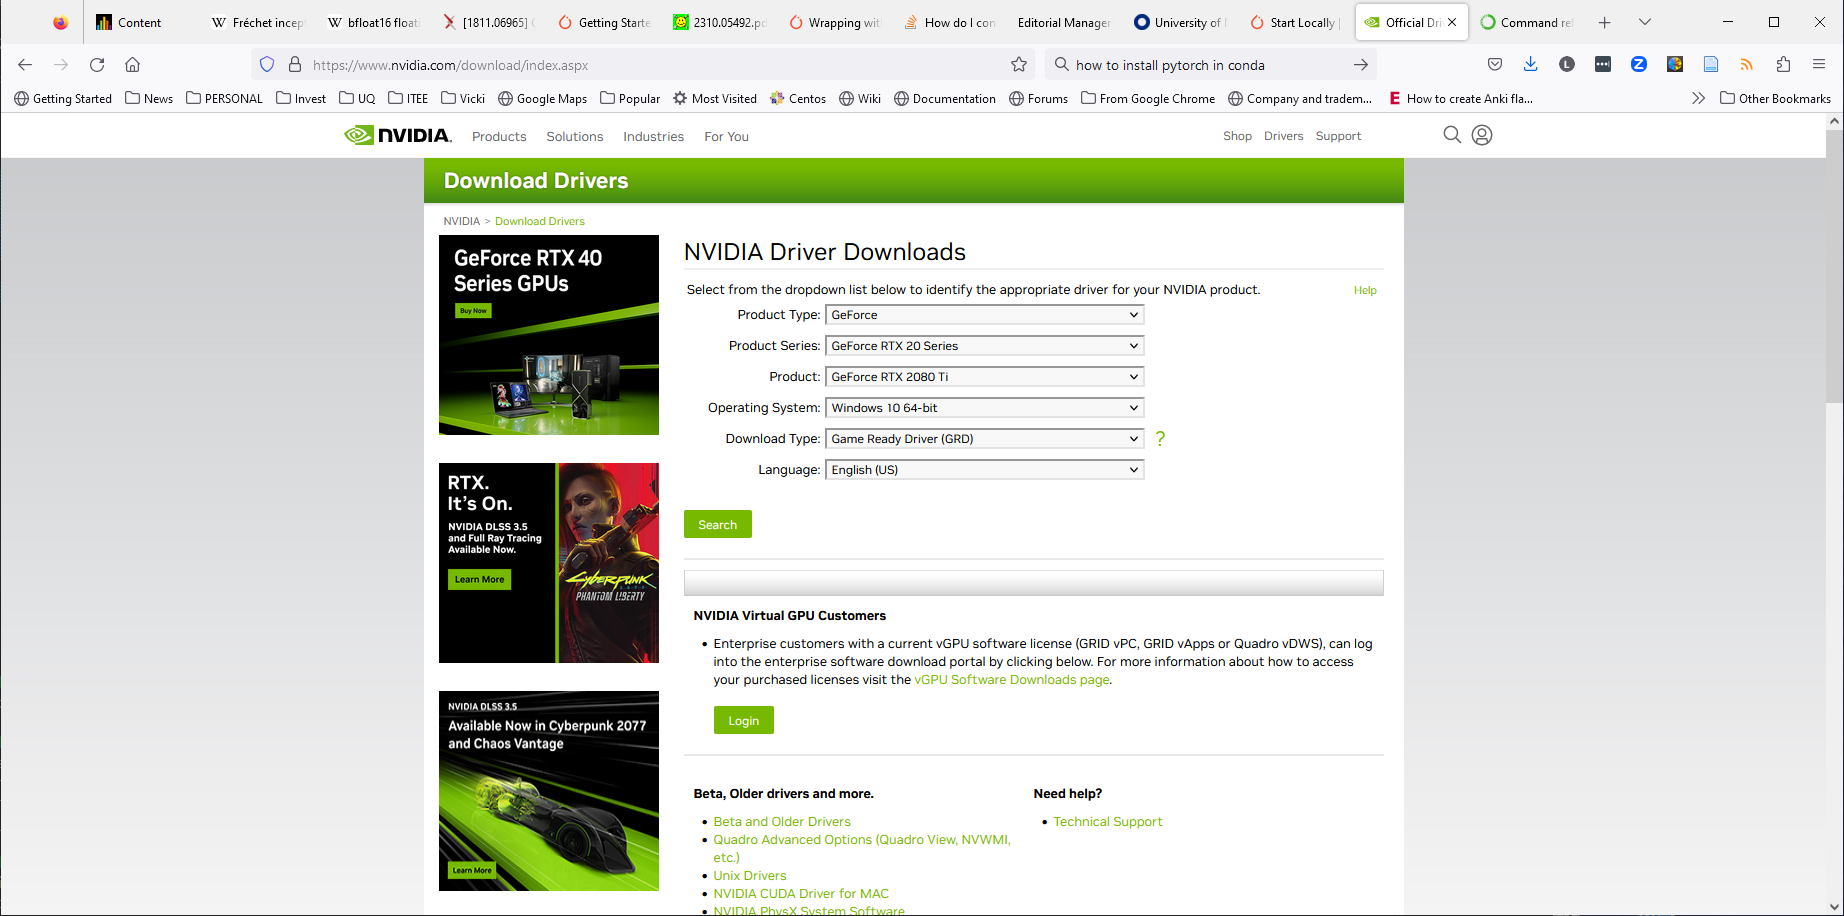
4. Update Nvidia Drivers
Some machines may have outdated Nvidia drivers. Visit Nvidia to download and install the latest driver for Windows. For the 78-336 Lab you should select the GeForce/RTX20 Series and the Studio Drivers.
This will require a reboot.
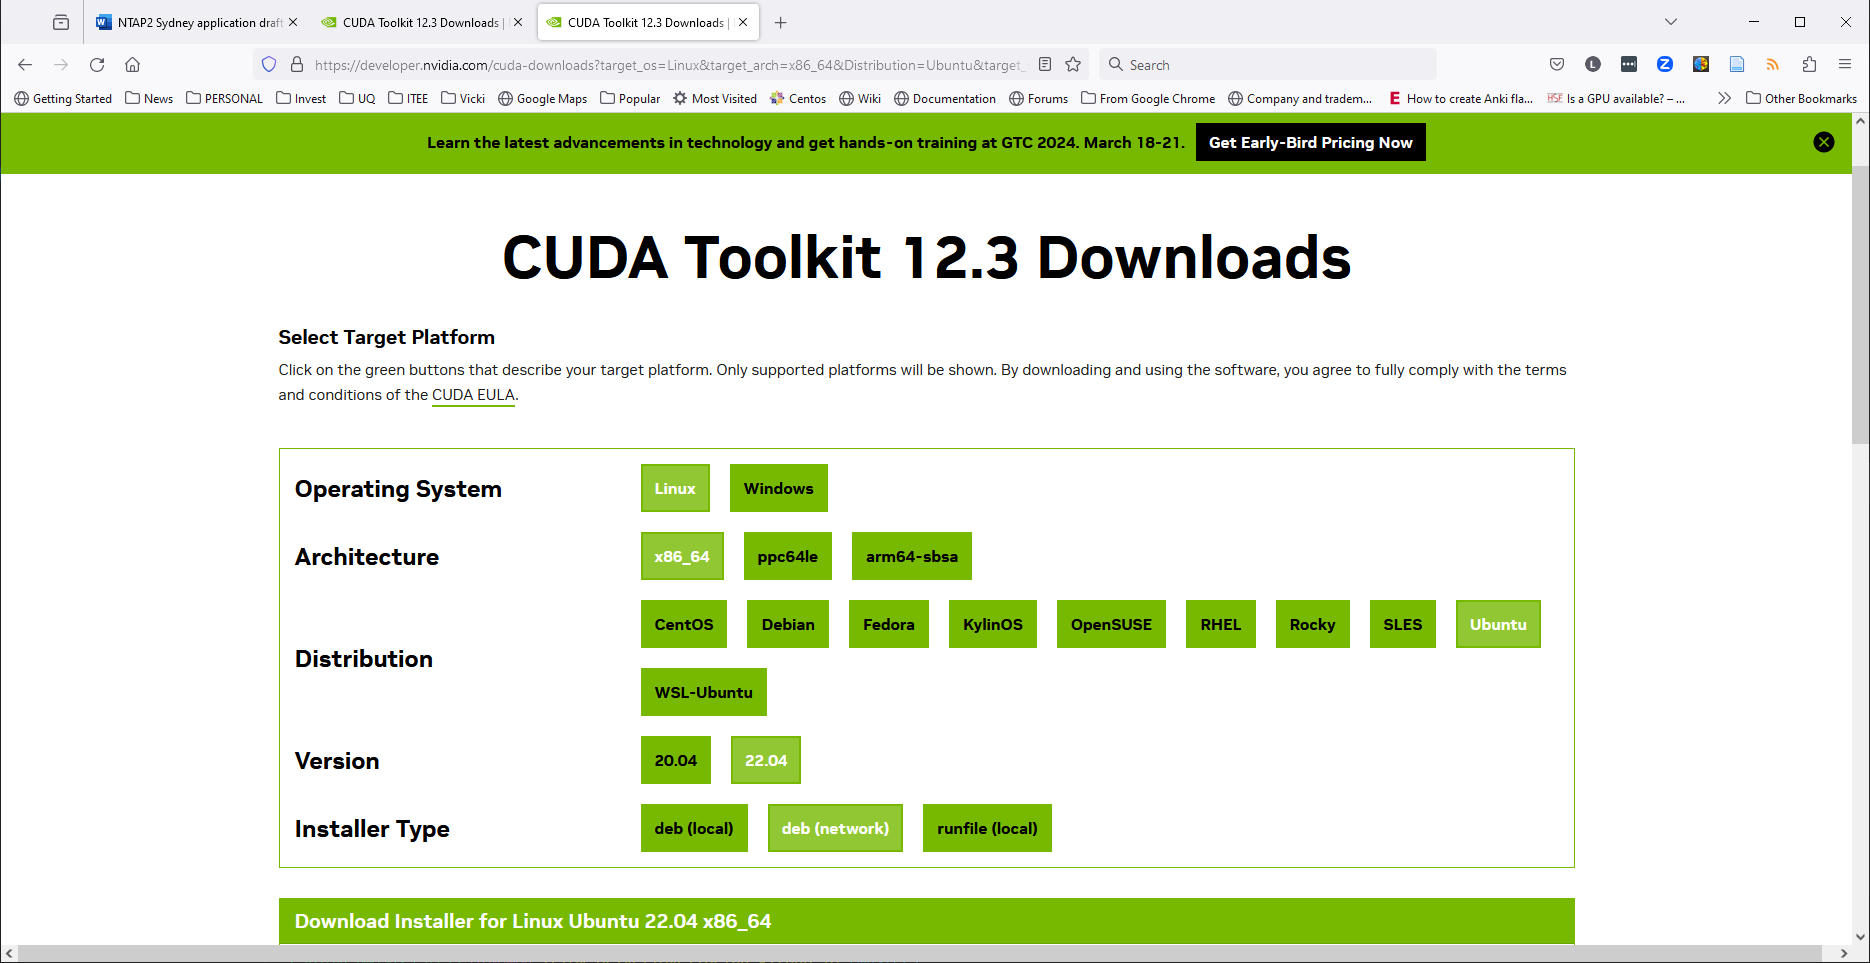
If you have a Linux machine, you should get your updated drivers and the CUDA Toolkit from Nvidia Developer.
A container is able to run on any GPU card because it mounts the local drivers. This means that the local CUDA drivers must be compatible with the container image. I currently use a very recent image of CUDA 12.2, so there is probably a need to update.
If running Ubuntu, you can use Ubuntu Nvidia Driver Install and the following command.
sudo ubuntu-drivers install
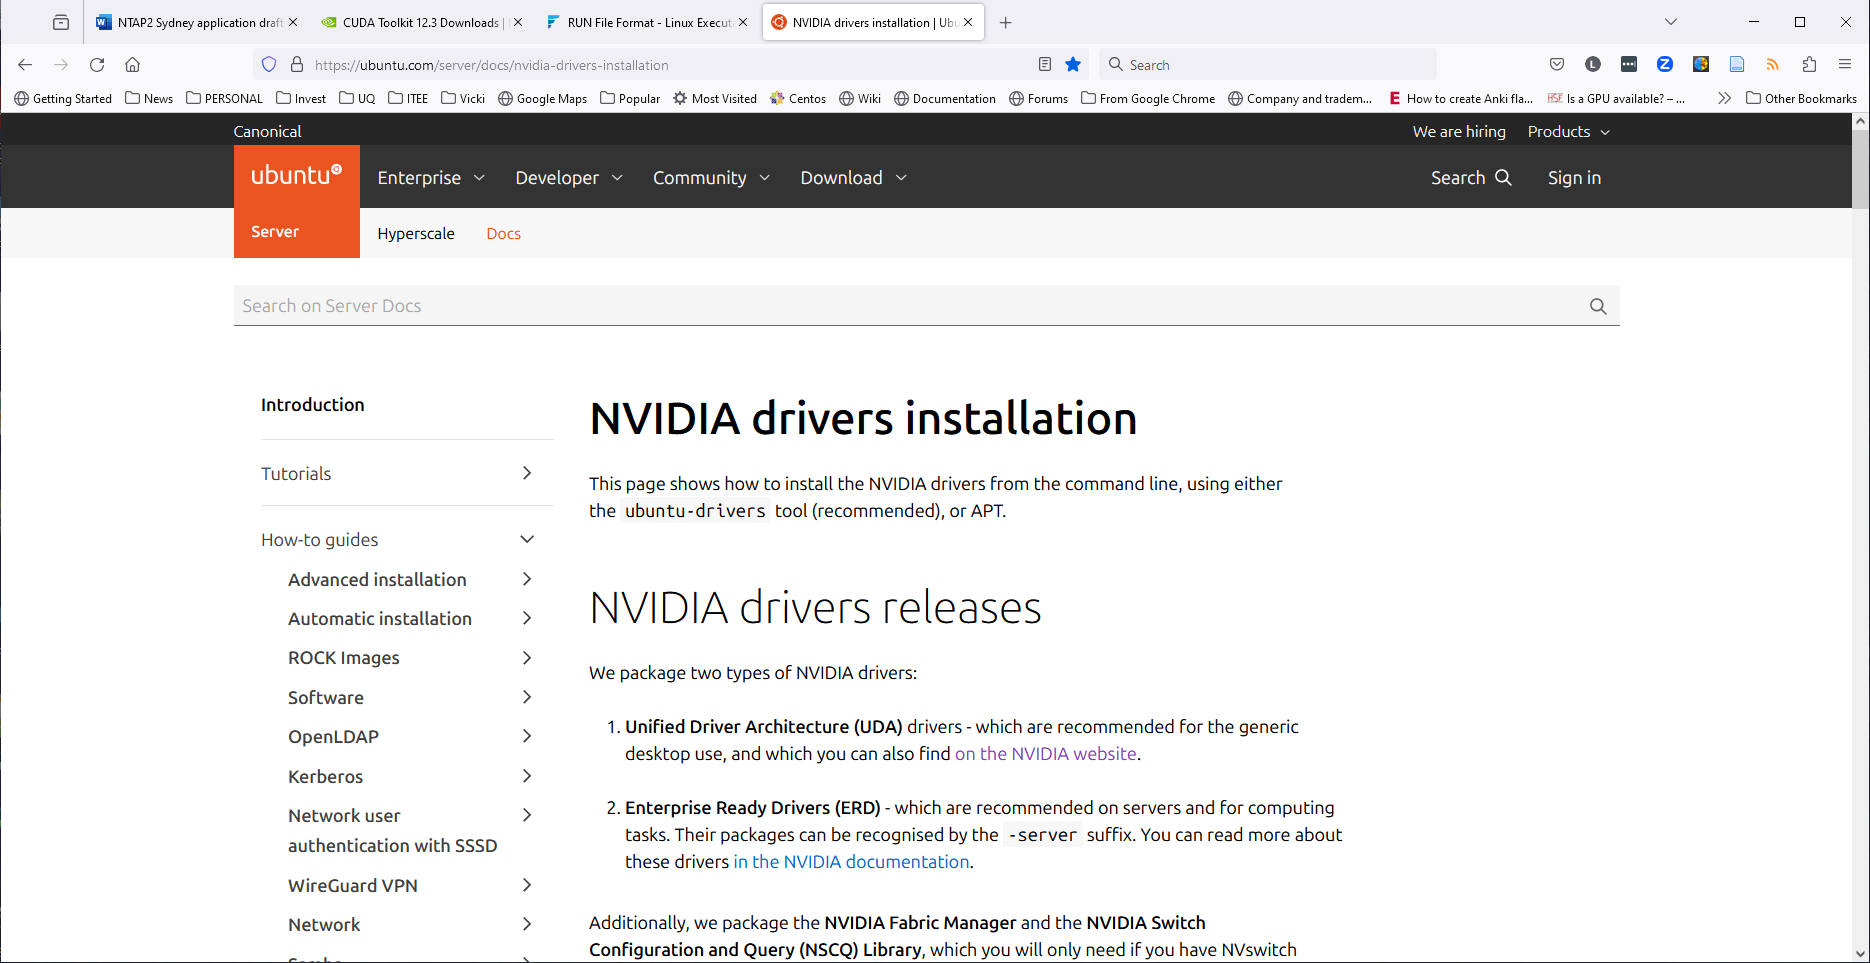
Just check that nvidia-smi works properly before moving on.
5. Install Visual Studio Code
Now Make sure you have Visual Studio Code (or pycharm) installed in Windows or Linux.
If not, fetch Visual Studio Code from here.
Open VS Code
Switch VS Code to the Linux file system by typing F1 (or Ctrl-Shift-P) then selecting WSL: Connect to WSL.
Now you can open the course22 repository in VS Code. If the WSL: Connect to WSL option is not available, you may need to install the WSL extension. You can do this by clicking on the Extensions icon on the left side of the screen and searching for WSL. Install this extension and then you should be able to connect to WSL.
Type F1 (or Ctrl-Shift-P) then select Git: Clone. Choose Clone from GitHub. Select repository lovellbrian/course22. You will then be asked where to put the files.
Alternatively fork the repository and clone the fork. Select repository <yourusername>/course22. If you make a fork, you can then use Git to synchronise your changes to GitHUB. Note that your fork is publically visible and security cannot be changed to private. Public assignment solutions are not permissible under University policy.
Fortunately, there is a different method to create a fork which can be made private. You must do this for your University Assignments.
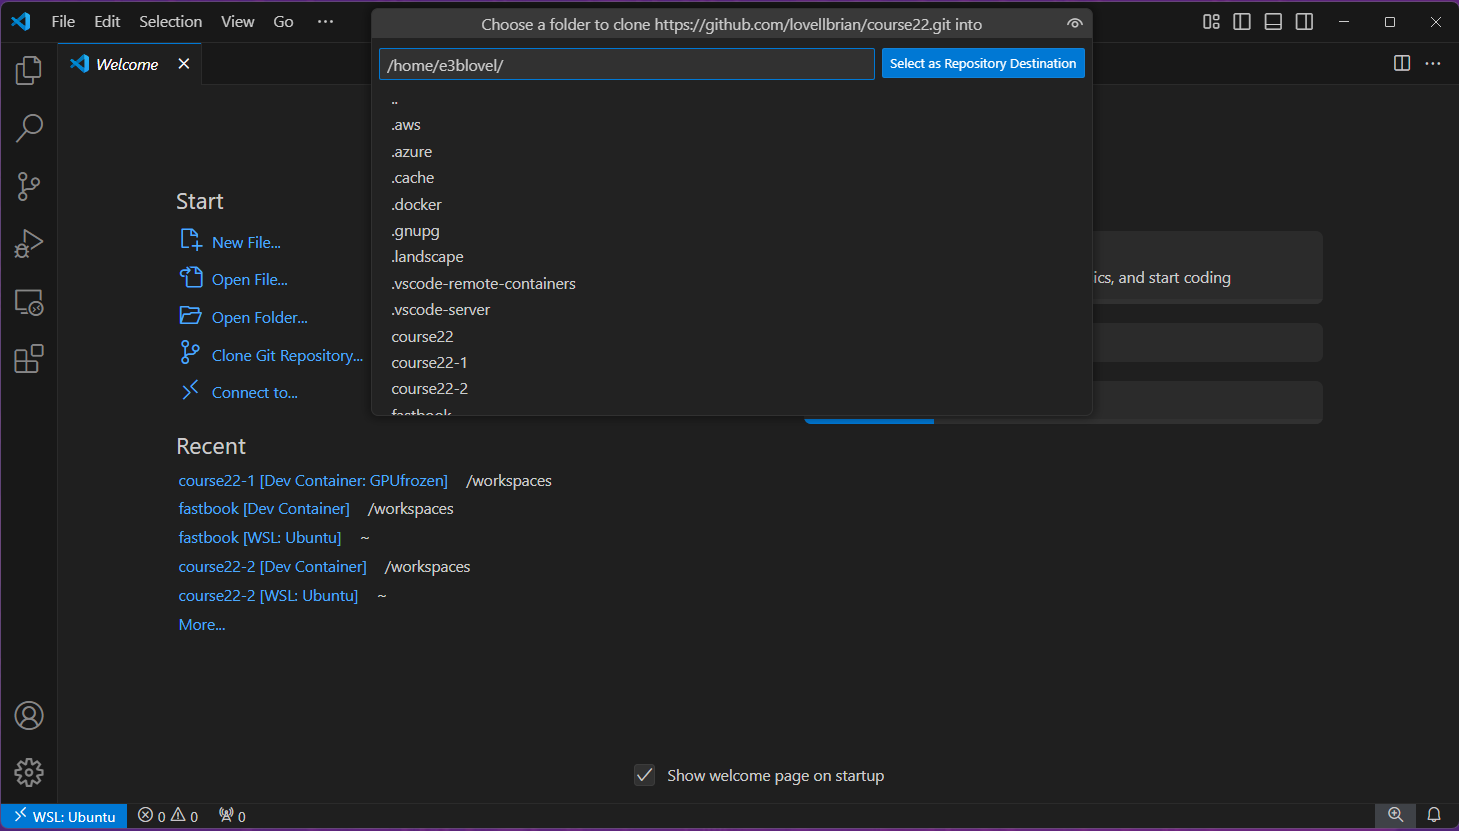
Simply accept the default of storing your repository in your home directory. Once the cloning is done, you will be asked if you want to Open the repository. Select this option.

Click down the bottom left of the window where it says the word master and change this to gpufrozen or cpufrozen. If you have a GPU you can use gpufrozen. If you only have a CPU you must use cpufrozen. These branch change instructions make sure you are using the modified code rather than the master branch which is the original fastai code.
Type F1 (or Ctrl-Shift-P) then select Dev Containers: Rebuild and Reopen in Container. Please click on Show Log to see the software being installed live.
If WSL connection gives an error message, delete the .vscode-server folder in your linux home directory and try again.
rm -rf ~/.vscode-server
Now we can watch the log file happily installing all the libraries.
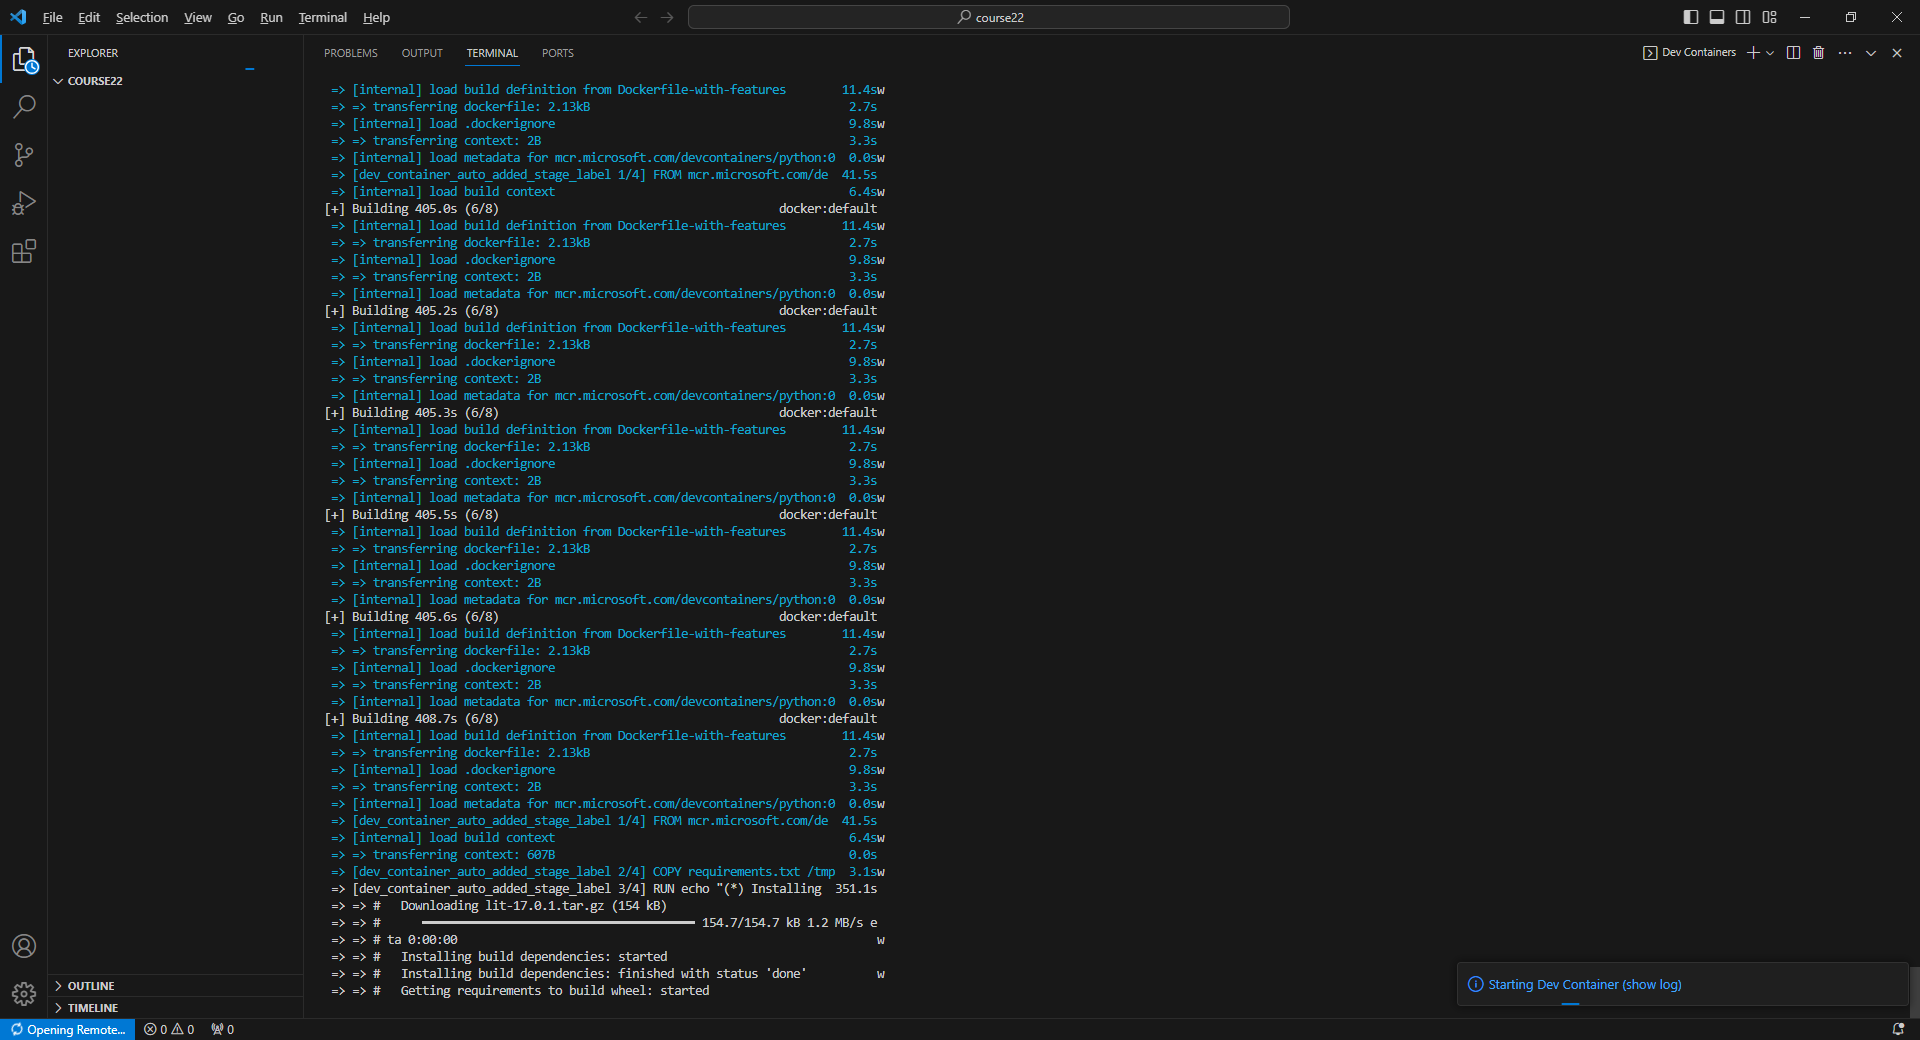
Enjoy the scrolling text or go make yourself a coffee. This will take 15 or more minutes on the first run. However, the next run will be only a few seconds.
Now open the Notebook 00-is-it-a-bird-creating-a-model-from-your-own-data.ipynb.
Click on Run All at the top of the screen. It will then ask you to choose a kernel source. Select Python Environments and the recommended version of Python (3.10.12 at the time of writing). Now the notebook should be running.
First, the notebook will fetch one bird image and then one woodlands image from the internet. Next it will download 200 birds and 200 non-birds to build a training set which should take about 7 minutes. After some clean up steps, the notebook will run deep-learning code to train a RESNET-18 classifier network. All learning is perfomed in vision learner. Note the graphics which shows you the learning progress. We are running 3 epochs and 6 batches per epoch. You will likely see that the error rates are very low approaching 0.
Stopping and Restarting the Container
Type F1 (or Ctrl-Shift-P) then select Remote: Close Remote Connection. This will place your back in the Windows Environment. Next Type F1 (or Ctrl-Shift-P) then select WSL: Connect to WSL to return to Linux. Chose your active repository by Cloning from GitHub or Opening the folder. Finally type F1 (or Ctrl-Shift-P) and select Dev Container: Rebuild and Reopen in Container to return to the Dev Container.
Other Things you can Try.
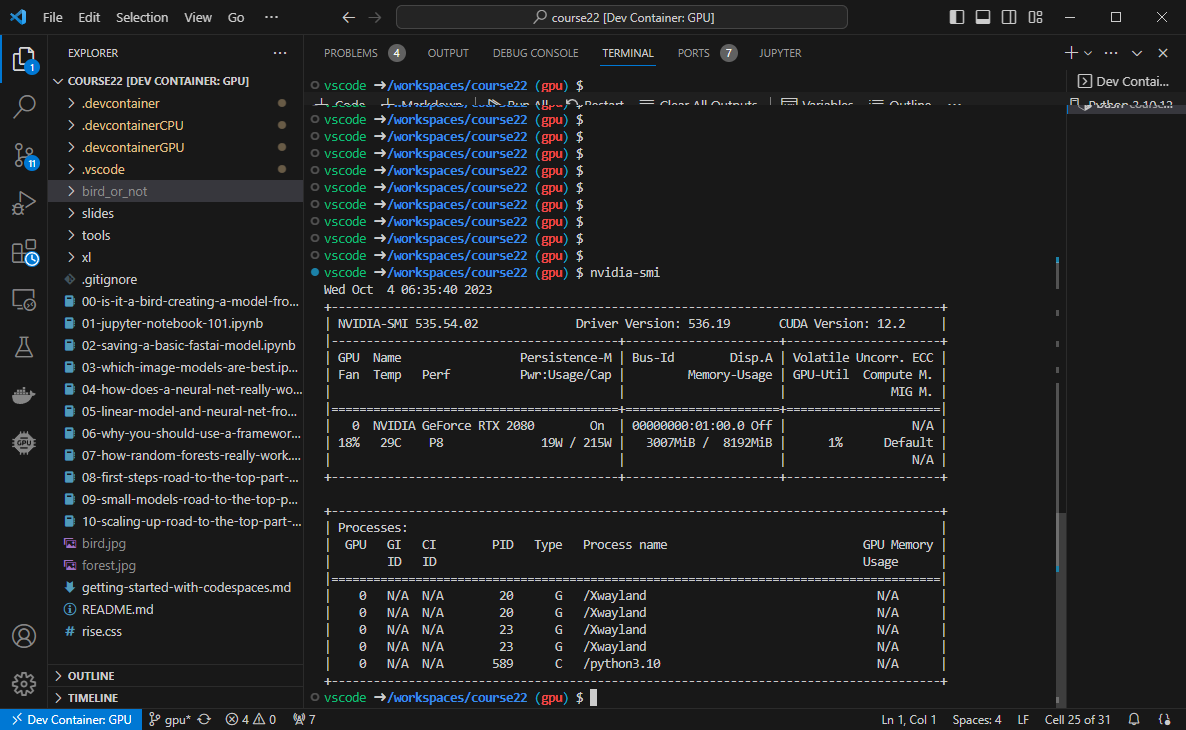
Try running the command nvidia-smi in a console terminal.
nvidia-smi
This will give you an output like this on our lab machines. This image shows that we have one NVIDIA GeForce RTX 2080 GPU Card with 8Gb of Memory in slot 0. This is a pretty fast card but the memory is a bit low for large CNNs. I prefer 16Gb or more.
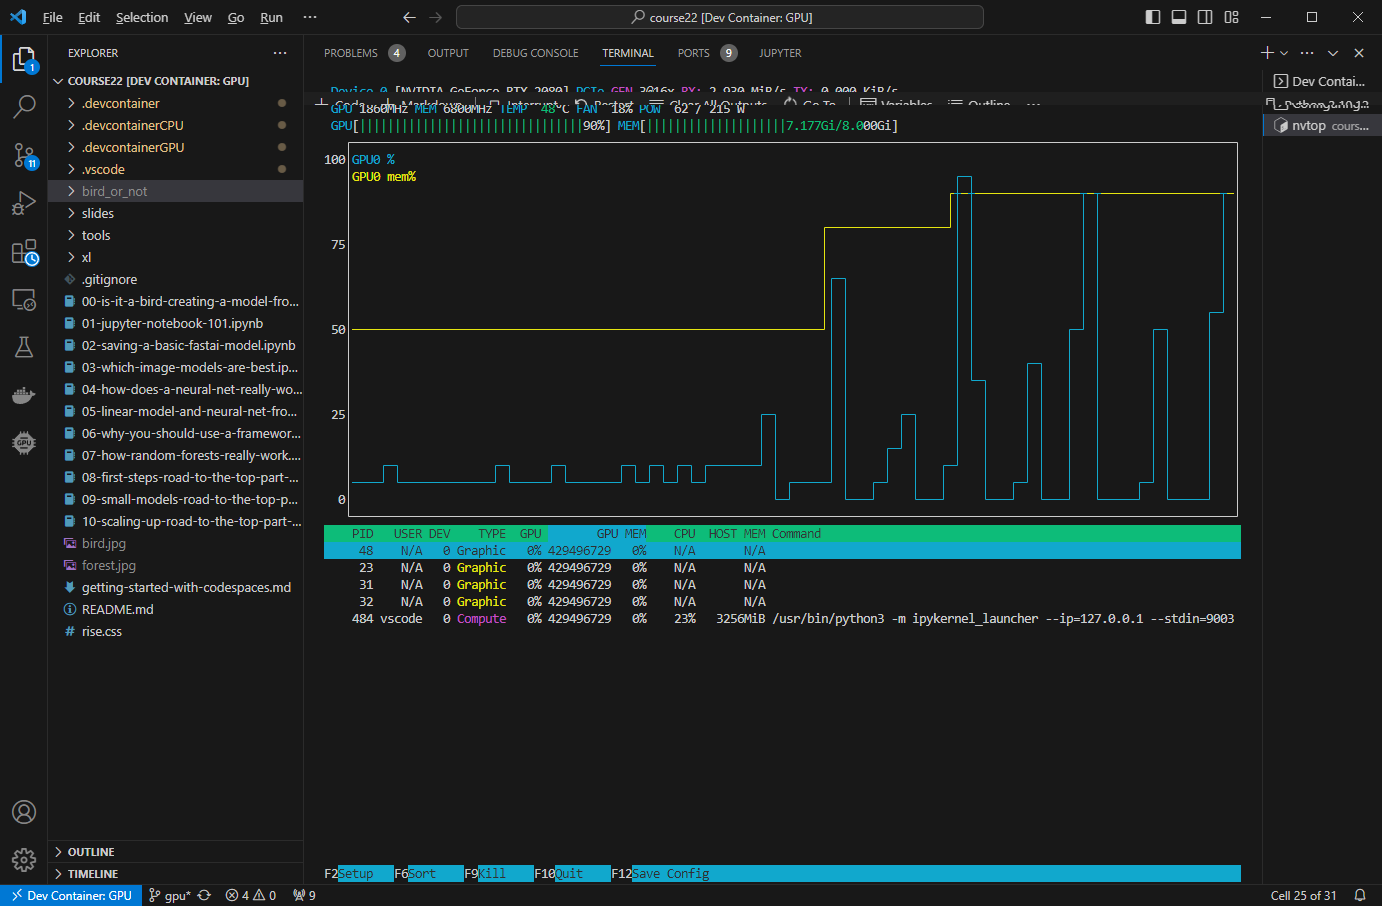
When we run with the gpu image the code is much faster as the GPU does most of the work. You can use the following console command to monitor the GPU.
nvtop
Notice how the GPU is working when the training code starts.
If you don’t see these graphs, try updating your nvidia drivers as above.
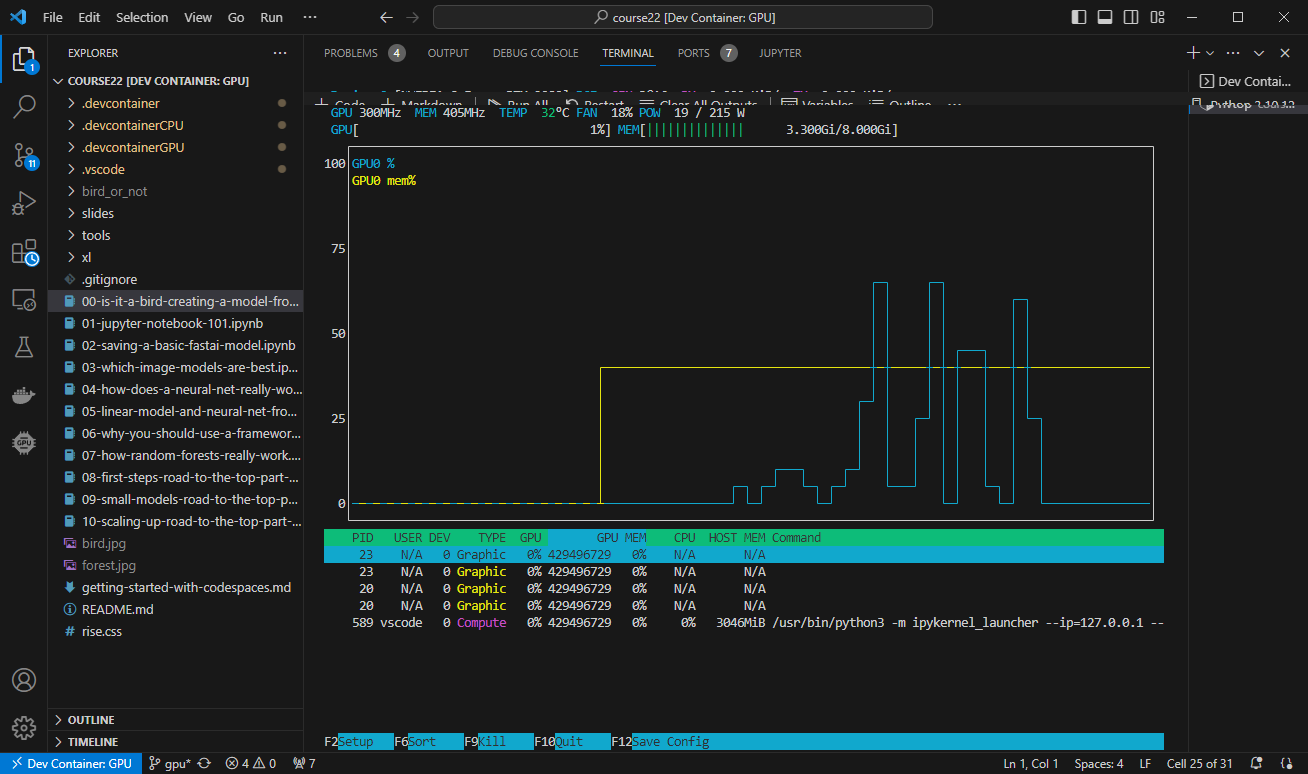
Why is the GPU only showing about 50% load? This means it does not have enough work to do. So how do we give it more work? Perhaps we need to increase the batch size.
Try increasing the batch size to speed up your learning (not telling how, but you need to insert bs=128 somewhere). The default batch size is 64. Try batch sizes of, say, 16, 32, 64, 128, and 256. Here is 256. Which gives the fastest learning. Please try to explain what is going on.
Troubleshooting
Docker does not Load
When creating your container check that the Docker Desktop window comes up and that a container is created. If not, uninstall Docker and reinstall it. Note that the uninstall command is crucial to getting this working.
No Kernel Available
This is a common problem and it arises because one of the VSCode extensions had not loaded correctly. Check though all of your extensions and see if any say reload. The most likely one is the Jupyter Extension.
Alternatively, just type F1 Remote: Close Connection and WSL: Connect to WSL and restart your container.
Bad Cached Data
When you run gpufrozen branch, it copies all of the libraries into ~/.local. The next time you start the container, it checks for the presence of ~/.local and if it exists, it does not copy the files again. Simply rm -rf ~/local to remove the user cache and reimage.
Try the gpu/cpu Branch
You can run the code on the gpu/cpu branch or the gpufrozen/cpufrozen branches. The gpu/cpu branches build from a Dockerfile and are considerably slower. However, they may be helpful in diagnosing certain problems.
If All Else Fails
If your system is not working properly, try rebooting the WSL subsystem with:
wsl --shutdown
A popup window will then ask you to restart wsl. This often fixes it. After restarting wsl, you can restart docker desktop.
Enjoy!
Happy coding on your personal Linux GPU Container.
Brian
